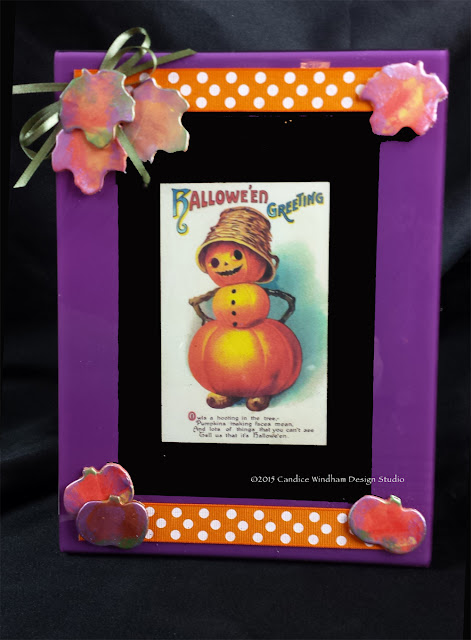
Happy Halloween Photo Frame
Nothing says Autumn like vintage Halloween images, and this
is one of my favorites.
I recently attended the Bella Crafts Connections' craft retreat in
Bloomington, MN and received a wonderful swag bag packed with new
products and supplies. One of the inclusions was this sweet purple frame
from Deflecto. I know it comes in a variety of colors, perfect for
allowing you to express your creativity. I have used Deflecto products
in the past to organize my workspace and have always admired the quality
and variety or their products.
Using this Deflecto frame makes the project easy, and once
October is over, I can swap the image out for a vintage Thanksgiving image. I had a lot of fall embellishments left over from a Makin's No Bake Clay project, and they were perfect for accenting this frame to display a vintage Halloween greeting card.
Here’s a tip that I used on this project: When you have bits and pieces of clay left from a project, either roll out and cut them with clay cutters, or use Makin’s Push Molds to create embellishments for future projects. See my Dancing Skeletons on the Makin’s Clay Blog.
Here's how I made it:
Supplies
Deflecto 4" x 6" Acrylic Frame
Makin's No Bake Clay, yellow and red, 1/3 package of each, plus scraps of other colors if desired for cutting extra embellishments
Makin’s Clay Cutters, Halloween #37052
Makin's Clay Machine
Makin's Clay Cutting Mat
Inka Gold, Violet, Green, Copper, Apricot (Viva Décor)
Beacon 3-in-1 Adhesive
Ribbon, Olive Green, 1/8" x 24" (Offray)
Ribbon, orange dot, 12" (Bo Bunny)
Printed Halloween Image
Instructions- Condition clay by running it through the Makin's No Bake Clay Machine.
- Mix half of the red and orange clay half and half, leaving
the clay partially mixed to create an orange-yellow color. The assortment of colors will make the leaves and
pumpkins look more realistic, although I got a little carried away and ended up covering most of the
color variety with Viva Décor's Inka Gold. Roll out mixed clay
and yellow clay with Clay Roller or Clay Machine. Cut pumpkins and leaves.

These embellishments were cut using the Makin’s Clay Cutters, Halloween #37052, from bits and pieces of leftover clay. The extras will be stored for quick embellishments for future projects. - Attach orange polka-dot ribbon to top and bottom of frame.
- Apply Inka Gold to the pumpkins and leaves.
- Adhere bow to upper left corner of frame and attach three leaves on top of the center of the bow with Beacon 3-in-1 Adhesive, covering the orange ribbon ends. Attach two leaves in the upper right corner.
- Attach the pumpkins along the bottom, covering the ribbon ends.
- Slip your Halloween image into the frame.


Comments