Handmade Gifts
Today begins another monthly edition of the Designer Crafts Connection Blog Hop. This month's theme is handmade gifts. Be sure to click on the Designer Crafts Connection button at left to hop forward or backward and see all the wonderful gift ideas from our talented designers.
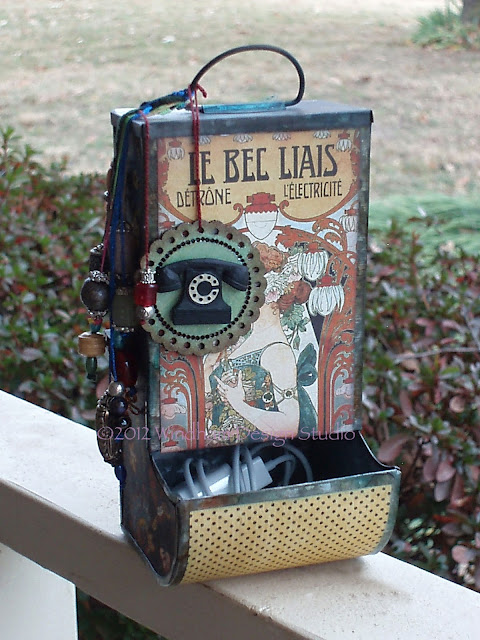
This little box began life as a chick feeder that I found on Decor Steals. (If you are not on their email list for daily bargains, you're missing out.) When I bought it, I didn't know what it would become, but knew that I loved it.
 |
| Chick feeder base |
Since so many of my friends and family are techno-junkies, I knew this little project would make the perfect gift. Just change the paper to make it for a man, woman or young teen.
Anyway, with the addition of some ink, embellishments and Graphic 45 papers, the lowly chick feeder is gloriously reborn as a charger cord holder. I can get the charger for an iphone, camera battery and AA & AAA recharger in this box with no cords left dangling. It can be hung on the wall near the receptacle generally used for recharging or left standing on a table or counter top. No more wondering where you put your chargers and no more masses of tangled cords piled up near the receptacle!
Here's how I did it:
Supplies
Chick feeder
Graphic 45 cardstock, two coordinating sheets, plus one with blocked images
Telephone Embellishment (Studio 490)
Scalloped Circle (Kaisercraft)
3D Stamping Cream (Viva Décor)
Alcohol Inks, Terra Cotta and Bottle (Ranger)
Inkssentials Blending Tool and felt pads (Ranger)
Alcohol Blending Solution (Ranger)
Liquid Fusion Adhesive
Chipboard
Miscellaneous fiber/ribbon scraps
Assorted beads
Directions
Note: All paper edges are inked with Colorbox inks before adhering to feeder.
 |
| Apply Alcohol Inks to entire box. |
 |
| Trace the side pattern onto chipboard and trim 1/4" inside the lines. |
3. Trim the blocked image to fit the upper front and adhere.
4 Apply 3D Stamping Cream to both sides of the scalloped circle. Adhere telephone embellishment and tie it to the box lid handle.
5. Tie several strands of fiber to the box handle. Add beads to the ends.
This is a quick little project and can be done in under an hour if you don't add the beads. That took longer than making the whole project!
Now, go find some chick feeders and you'll be able to cross a couple of gifts off your list, and then go hug your sweetie. Hugs make every day much better!
Note: I received product from Kaisercraft, Viva Décor,Liquid Fusion, Studio 490 and Clearsnap.


Comments